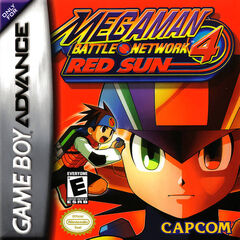
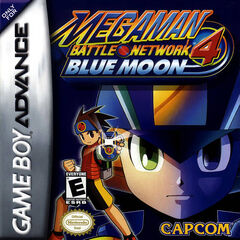
| Mega Man Battle Network 4 | |
|---|---|
American Box Arts | |
| Developer(s) | Capcom |
| Genre(s) | Real Time Tactical Role Playing |
| Release Dates | June 27, 2004 (NA) |
| Platform(s) | GBA |
| Current WR Time | Any%: 2:41:05 by KyrieZea
Any% NE: 2:42:10 by KyrieZea |
Overview[]
Due to the RNG invovled with the tournament boards, Battle Network 4 is one of the harsher games in terms of RNG. You also get the Navi Customizer and access to the Number Trader fairly late, not until after the first tournament.
There is really no way to cheese the game as both Soul Unison's and PA's are inpractical to utalize in a speed run (outside of LifeSword which you get very early on) making your only consistent options VarSwords, AirHock3 (Which you get only one of and cannot harm Duo with) and LifeSword.
It may be ideal to reset until you get an array of Boomer's and Tornado's before the first Heel Navi fight as both these chips (Particularly Tornado) deal great damage. Both are RNG though. You can only get Boomer from fights with a Boomer Virus, and you can only get Tornado from Battle Green Mystery Data in the Town areas.
A core thing to be aware of is that 2 bosses in this game have access to every chip you have ever used and in the current route only a handful of chips are ever used (15-25) and almost half of those have amazing destructive potential. What this means is that certain bosses can and will instantly kill you because half of their movepool is simply that strong, as a result it is important to consider your use of certain chips (namely DarkVulcan and your version specific giga chip) prior to the DarkMega fight.
Timing starts on New Game and end's when Duo loses all health. If a screen dimming chip is used, wait until the effect ends and Duo starts exploding.
The in-game timer is currently considered too inaccurate to use as a basis.
Tournament Boards[]
Den Battle Tournament:
Ideally, your first match will be against Ponta. One of the optional normal navi's in the Ponta scenario will give you 3000z in addition to it being faster than Tetsu.
Gutsman/Aquaman will always be fought on your first playthrough. Aquaman is faster.
The major thing to look for in this tournament is that you'll be fighting Sparkman instead of Topman. The Sparkman scenario is MUCH faster, involving only a run to Electown to input a code and come right back.
Thankfully, due to having to fight Gutsman/Aquaman this board is extremely predictable.
If Guts/Aqua are fighting Sparkman, reset.
If Guts/Aqua are fighting Topman, you will fight Sparkman.
If Guts/Aqua are fighting a Heel/Normal Navi, play until either Spark or Top loses. If Sparkman loses, reset.
Note that Aquaman is fast (and costs less zenny) than Gutsman.
Hawk/Eagle Tournament:
RNG for this tournament is much less predictable, but the scenario's don't differ much in length. But we can determin that if you're fighting one Unison navi you wont fight the other, and if you're fighting a Heel or Normal Navi, you wont fight the other, and if you're fighting one of the non-unison navi's you wont fight the other. Ideally you wont ever reset on this tournament.
Prefered scenarios: Windman/Woodman, Videoman and Crusher (Heel Navi). All three Scenario's are fast with easy fights. I'm adamant that the Videoman and Crusher scenario's are faster than the alternatives. The Roll/Metalman and Flave scenarios are much slower.
Red Sun/Blue Moon Tournament:
The important thing here is that Thunderman is faster than Searchman by a considerable amount. If you get Searchman, reset. Protoman will also be the same for Blue Moon. Similarly to the Hawk/Eagle, I don't think the other matchs differ too much. If you're fighting Thunderman/Junkman in the first round, then you're clear. This is also the last major reset point.
Prefered Scenarios: Thunderman/Junkman, Foot Bomb (Normal Navi), Kendoman (Unlikely as it is. Assume you're getting Coldman). Searchman/Protoman are extremely slow, as is the Water God (Heel Navi).
Version Differences[]
Scenarios and Tournament Boards
The second tournament is called the "Hawk" or "Eagle" tournament depending on version. Obviously, the third is Blue Moon or Red Sun.
Aquaman is a 100% chance in Blue Moon, Gutsman is a 100% chance in Red Sun. Aqua is faster and doesn't cost 1800z like Guts does.
Chips and Chip Codes
The biggest difference is the giga chip given to you by your dad at the end of the game. The Red Sun chip is slightly stronger than the Blue Moon chip, but overall the difference is small.
Random Battles
In the Japanese versions, saving your game every 20 or so steps will reset the encounter rate for the area you're in, making it a bit faster to run on Japanese.
This is where the Any% NE category comes from. Any run that uses the Japanese version of the game AND uses save-abuse to limit encounters is an Any% NE run, however, if a Japanese version of the game is used and it doesn't use this save-abuse, it is still considered to be in a regular Any% run.
Specific Scenario Notes[]
Ponta In this scenario you are told to defeat the ghost navis on the net, whilst there are 7 navis in total, you must only fight the 4 which are considered "evil" in order to progress, they are located in ACDC2, ACDC3, Town1, and Town2.
Sparkman Despite prior assumptions, it is now clear that the code used to unlock the PET in this scenario is randomly picked from a short list, the list is as follows:
9651345, 9681345, 1863546, 7374262, 1563546
Dark Mega and Duo[]
Before entering the last area, I recommend editing your folder to have all your VarSwords, LifeSword, Tornado's, GunDelSol's, Invis' (For use with GunDelSol), Boomer's and TwinFang3. Anything that requires panel's to hit is useless, this includes AirHock and Bombs so take those out. Now just load the rest of your folder with * code chips for draw speed and hope for the best. You may also need to Full Energy after that fight with Laserman if you were left on 1hp (To deal with duoble gunners). You're auto healed before the Dark Mega fight and again before Duo.
Dark Mega:
Dark Mega is a pretty easy fight since he copies your HP, which is considerably low (Probably below 300). Use your buster charge when you can and hit him with whatever you draw. The important thing to note about Dark Mega is that his chip pool includes every chip you've used at least once in your playthrough so avoid using Dark Vulcan or Red Sun/Blue Moon before this fight. He can use PA's and every VarSword code (Even code's you haven't used) so avoid the two forward columns unless you have a Lifesword of your own. You should also avoid being on the same row as him except for aiming buster shots. Also be careful of GunDelSol EX and AirHock3, both can and will end you in seconds. Once he's down get ready for a longer, but less tense fight against Duo.
Duo:
Unlike the Dark Mega fight, you can nearly perfect Duo with practice. There's no silly RNG to one shot you in this fight, just be patient and hit him with buster shots between dodges while you wait for your strong chips.
HP Memory[]
Route to run in Town and Park: http://pastebin.com/DpZNavsP Town: 160 // Park: 260
Picking up any other convinient HP Memory will help out in the Duo fight and to pad some of the loss from dark chips.
- ElecTower Comp 2: Next to the Sonar.
- Toy Robo Comp 2: First dock after using the "WzMonkey" data.
- Toy Robo Comp 4: Dock with two text doors. Optimal to get it after opening the first door.
- Ice Cream Stand Comp: Bottom left corner.
- Eagle Tournament Battle Comp: Jack in after any scenario, bottom right corner.
- Netopia Area: BMD behind the ramp leading to Sharo.
- Sharo Area: First BMD on the way to get Blackbomb
- There is a HP Memory in one of the comps during Coldman's scenario. BMD in the top left, the comp does not have a snowman next to the BMD. (I forgot which comp # it is).
- Meteor Comp 1: Far left/bottom-left of the comp. Grab it before you pass the 3 tile.
Run Rates[]
http://pastebin.com/raw.php?i=7j7kLWw4
Resources[]
Meteor Comp Maps:

